Terms And Conditions Please Read and Accept the Daytona Drone Club Terms to participate in the Forum
Failed attempt to setup Frsky R-xsr left us moving to CRSF
Here we go!
CRSF Crossfire Telemetry
TBS CRSF Crossfire telemetry is used to send telemetry data from the flight controller (the vehicle's attitude, battery, flight mode and GPS data) to the RC transmitter (Taranis).
Benefits in telemetry include:
- Only a single UART is needed for RC and telemetry.
- The CRSF protocol is optimized for low latency.
- 150 Hz RC update rate.
- The signals are uninverted and thus no (external) inverter logic is required.
in the configuration of the serial port select the RCIN protocol and set the serial options to half-duplex operation. So for example for serial port 4:
- Set SERIAL4_PROTOCOL = 23
- Set SERIAL4_OPTIONS = 4
- Set RSSI_TYPE = 3
https://ardupilot.org/copter/docs/common-rc-systems.html
crsf
Connect the RX pin of the UART to the TX pin of the CRSF
The Pixhawk always receives its control from your radio transmitter via the s.bus or PPMsum output of your receiver. In that single signal wire connection is a stream of pulses that represent every channel on your RC Transmitter that you have setup
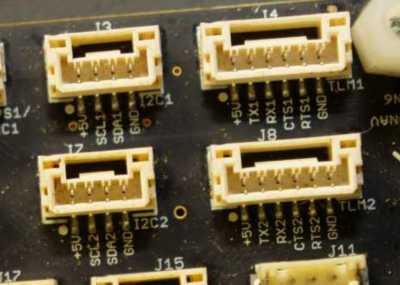
just posting this for referance on this page, still no nano communication to Kore carrier boart. Used telm1, telm2, gps1,gps2
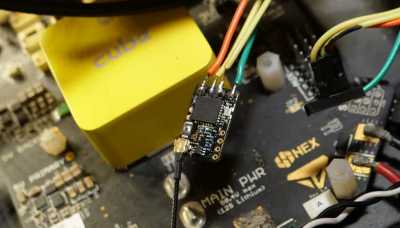
I get green light from nano and connection to tx16s but mission planner is a no go
Any Crossfire compatible receiver can be used with ArduPilot.
If you do not wish to use telemetry then a TBS Crossfire receiver can be connected to the RCIN port using SBUS
CRSF Receivers
If you wish to use telemetry then a TBS receiver can be connected to a UART utilizing the CRSF protocol.
CRSF is a full-duplex protocol that supports integrated telemetry and a number of other features. Connect the RX pin of the UART to the TX pin of the CRSF device and vice versa. Currently a full-duplex UART connection is required.
In the configuration of the serial port select the RCIN protocol. So for example for serial port 4:
- Set SERIAL4_PROTOCOL = 23
- Set RSSI_TYPE = 3
With the receiver connected and configured correctly proceed with RC calibration as normal.
CRSF Video Transmitters
TBS Video Transmitters can also be connected to ArduPilot using the CRSF protocol. This allows the VTX to be configured via parameters and, for VTXs such as the TBS Unify Evo , receive telemetry data that can be displayed using the built-in OSD.
If you are using CRSF for RC input as well then nothing more needs to be done in order to enable VTX control.
If you only with to use CRSF for VTX control then connect the VTX to the UART in the normal way - TX to RX and RX to TX and configure the UART connection as follows:
- Set SERIAL4_PROTOCOL = 29
Wiring the transmitter NOTE: The out RX goes to the IN TX on the boards your installing . It sounds silly but you dont connect rx to rx, it's rx to tx
Going to try setting up a mini carrier board to see if there are better instructions and information so I can get a different approach. So far Kore carrier SUCKS and their instructionals SUCK
Lucky I had another cube carrier board I could try with the same results. This board has the pins labeled RC IN. This is what the setup instructions say to look for, the KORE board has this labled as PPM
Went back to Kore setup and wired the CRSF nano to PPM pins at the AUX bus.
Setup the TX16s
turn on the drone, select SYS-then the XF nanoand change the output 1 to SBUS


